 📌 Pin
Pumpkin pie belongs on a November table for a reason: its mellow squash flavor, fragrant spices, and tender pastry make a familiar ending to a generous holiday meal. This straightforward version uses canned pumpkin, evaporated milk, and a ready-to-use pie crust, so you can focus on getting a smooth filling and a properly set custard instead of juggling extra pastry work. It is meant for U.S. home cooks planning Thanksgiving or another autumn gathering in November 2026.
The filling is mixed in one bowl and baked in a standard 9-inch crust. The method keeps the center creamy while giving you practical visual and temperature checks. A little wobble is normal; a liquid center is not. Chill the pie thoroughly before slicing for neat portions, then serve it plain or with softly whipped cream.
Why this pumpkin pie works
Evaporated milk contributes a concentrated dairy richness without the sweetness of condensed milk. That matters because the recipe controls its own sugar and spice balance. Pumpkin purée, eggs, and milk form a custard that sets gently in the oven. Cinnamon, ginger, nutmeg, and cloves add familiar warmth without masking the pumpkin.
The filling is mixed just until smooth rather than whipped until foamy. Less air helps reduce dramatic puffing and settling. Starting the pie in a hotter oven gives the crust a useful head start; lowering the temperature helps the custard finish more evenly. Pie crusts and ovens vary, so use the baking window as a guide and rely on the center’s movement plus a thermometer rather than the clock alone.
Ingredients and useful notes
Use a 9-inch standard pastry crust, refrigerated or frozen and thawed according to its package. A deep-dish shell is not needed for this amount of filling. Set it in a sturdy pie plate on a rimmed baking sheet; the sheet makes the pie easier to move and catches drips.
Choose one 15-ounce can labeled 100% pumpkin, not pumpkin pie filling. The latter is already sweetened and spiced, which would throw off this recipe. Measure the pumpkin by using the full can. Give it a quick stir if liquid has pooled on top, but do not drain it unless the can is unusually watery.
Use three large eggs, preferably brought closer to room temperature so they blend smoothly. The filling also needs ¾ cup packed light brown sugar, 1 teaspoon ground cinnamon, ½ teaspoon ground ginger, ¼ teaspoon ground nutmeg, ⅛ teaspoon ground cloves, and ½ teaspoon fine salt. Freshly grated nutmeg is welcome, but keep the amount the same. One 12-ounce can of evaporated milk supplies the liquid; shake the can before opening. Do not substitute sweetened condensed milk ounce for ounce.
A small amount of spice can be adjusted to taste, but keep the total liquid and eggs unchanged for dependable setting. If using a deep-dish crust, this filling will not reach the rim; do not increase the ingredients without adjusting the pan size and bake plan.
How to make easy pumpkin pie with evaporated milk
- Heat the oven and prepare the crust. Position a rack in the lower third of the oven and heat it to 425°F. Place the crust in its pie plate and crimp or press the edge as desired. Set the plate on a rimmed baking sheet. If the crust package calls for thawing, follow its directions. Do not prick the bottom; the liquid filling can seep through holes.
- Mix the dry seasonings. In a large bowl, whisk together the brown sugar, cinnamon, ginger, nutmeg, cloves, and salt. Breaking up brown-sugar lumps now makes a smoother filling later.
- Add the pumpkin and eggs. Whisk in the pumpkin until evenly combined. Add the eggs and whisk gently until no streaks of egg remain. Avoid beating vigorously; the goal is an even custard, not a frothy one.
- Blend in the evaporated milk. Pour in the evaporated milk gradually while whisking. Scrape the bottom and sides of the bowl once. The mixture should look uniformly orange and fluid, with no visible streaks of milk or egg. Pour it into the crust. Carefully transfer the baking sheet to the oven.
- Start hot, then lower the heat. Bake for 15 minutes at 425°F. Without opening the oven for long, reduce the setting to 350°F and continue baking for about 35 to 45 minutes. Check early if your oven runs hot or the crust edge is browning quickly. If needed, shield only the crust rim with foil or a pie shield.
- Check doneness safely. The edges should look set, while a small area in the center should quiver gently when the pan is nudged. It should not ripple like liquid. For the USDA-recommended egg-mixture safety endpoint, insert an instant-read thermometer into the center of the filling without touching the pan; it should register 160°F. If it is below that, continue baking in short increments and check again. Avoid waiting for the entire center to become rigid in the oven, which can overcook the custard and lead to cracks.
- Cool, then chill. Move the pie plate to a rack and let it cool at room temperature for about 2 hours, until no longer warm. Refrigerate it promptly after that cooling period and chill at least 3 more hours before slicing. The filling firms as it cools. Use a thin sharp knife and wipe it between cuts for cleaner wedges.
Make-ahead, storage, and reheating
This pie is convenient for a holiday schedule because it needs a long chill. Bake it the day before serving, cool it, then cover and refrigerate. For best texture, avoid covering the top while it is still warm; condensation can collect on the custard. Once cold, cover loosely or use a pie container.
Because this is an egg-and-milk custard, do not leave it on the buffet for extended periods. Refrigerate leftovers within 2 hours, or within 1 hour if the room or outdoor temperature is above 90°F. Keep covered in the refrigerator and use within 3 to 4 days. USDA’s egg guidance lists pumpkin pie among pies refrigerated after baking and gives 3 to 4 days for refrigerator storage.3
Serve chilled or let slices stand briefly while setting the table. If you prefer a warm slice, reheat an individual portion gently in a 300°F oven until just warmed through; avoid microwaving for too long, which can make the custard hot in spots and soften the crust. Do not leave the whole pie at room temperature for serving all afternoon.
Variations and serving ideas
For a slightly bolder spice profile, increase cinnamon to 1¼ teaspoons while leaving the other spices unchanged. For a simpler flavor, use 1½ teaspoons pumpkin-pie spice in place of the cinnamon, ginger, nutmeg, and cloves; check its label because blends differ. A pinch of black pepper can add a subtle warmth, but it is optional.
A homemade all-butter crust works in place of the packaged crust if it is fitted to a 9-inch pan and chilled before filling. If you want an attractive edge, crimp it firmly and cover it with a pie shield once it is golden. Keep the filling recipe the same.
Offer each slice with lightly sweetened whipped cream, plain whipped cream, or a spoonful of crème fraîche. For a holiday dessert spread, serve modest wedges after dinner rather than adding another overly rich topping. A hot cup of coffee or tea pairs well with the spice.
Troubleshooting common pumpkin pie problems
The center is still liquid. The pie needs more time. Continue baking at 350°F in 5-minute intervals, then check both the gentle wobble and the 160°F center temperature. Ovens and dish materials affect timing.
The surface has cracks. A crack usually means the custard was baked too long or cooled abruptly. The pie remains usable; hide a small crack with whipped cream if you like. Next time, remove it when the perimeter is set, the center still trembles slightly, and the center has reached 160°F.
The crust is browning before the filling is done. Cover the edge loosely with foil or use a pie shield, leaving the center exposed. Do not wrap the whole pie tightly while it is baking.
The filling has bubbles or a rough surface. Vigorous whisking can add excess air, and a very hot oven can encourage bubbling. Mix gently and avoid repeatedly opening the oven. A few small surface marks do not affect the flavor.
The first slice slumps. The pie likely needs more cooling and chilling. Wait until fully cold before cutting. Custard pie is not meant to slice cleanly straight from the oven.
Frequently asked questions
Can I use pumpkin pie filling instead of pure pumpkin?
Not in this recipe without changing the sugar and spices. Use canned 100% pumpkin. Pie filling is pre-seasoned and sweetened, so it changes both flavor and balance.
Can I make the filling ahead?
Yes. Whisk it together, cover, and refrigerate for up to one day, then stir gently before pouring into the crust. If it has separated slightly, a slow whisk will bring it together. Do not leave raw egg mixture at room temperature. Add the filling to the crust shortly before baking.
How do I know pumpkin pie is done without a thermometer?
The outer portion should appear set, and a small central area should jiggle gently as one piece when nudged. It should not slosh. A thermometer is the more reliable safety check for egg mixtures; USDA advises cooking them to 160°F.2 Do not mistake a slight center wobble for raw liquid filling.
Does pumpkin pie need to be refrigerated?
Yes. This recipe contains eggs and evaporated milk and should be refrigerated after cooling. Keep it covered and use within 3 to 4 days. For a gathering, put out slices in manageable batches and return the pie to the refrigerator rather than leaving it out for hours.
Can I freeze pumpkin pie?
For best texture, serve it fresh or refrigerated within the storage window. Pumpkin custard may be frozen, but thawing can make the filling release moisture or become less smooth. If freezing is necessary, cool the pie fully, wrap it well, freeze, and thaw in the refrigerator; expect some texture change.
What makes this recipe distinct
CircleRecipes already covers savory Thanksgiving sides and mains such as Green Bean Casserole, One-Bowl Thanksgiving Cornbread, and Thanksgiving Mac and Cheese, with Cranberry Sauce and Stuffing drafts also in progress. This article fills a separate dessert need: a classic, custardy pumpkin pie built around evaporated milk, with a focus on practical doneness, chilling, and holiday make-ahead logistics. It does not retread side-dish or stuffing instructions.
Internal link suggestions: Once the site audit confirms the exact URLs, add contextual links to the existing Green Bean Casserole, One-Bowl Thanksgiving Cornbread, and Thanksgiving Mac and Cheese pages, plus the Cranberry Sauce draft if it is published. These are suggestions only; no URLs have been inferred.
Sources and seasonal search context
Google’s Thanksgiving 2025 Trends page states pumpkin pie was the top-searched Thanksgiving pie, while the page’s current seasonal trend list also reflects strong Thanksgiving recipe activity. A November 26, 2025 report summarizing Google Trends said pumpkin pie was searched by a majority of states. These are useful indicators of holiday relevance, not monthly keyword-volume figures or a forecast for November 2026.1 2
For the bake, King Arthur Baking advises removing pumpkin pie while its center is still wobbly because overbaking can cause cracks. That supports the visual cue here, paired with the USDA safety endpoint for egg mixtures: 160°F in the center.4 USDA FSIS also advises prompt refrigeration and thorough cooking of eggs, and lists pumpkin pie among pies refrigerated for 3 to 4 days.3
Conclusion
This easy pumpkin pie keeps the ingredient list familiar and the method manageable: mix a smooth evaporated-milk custard, bake until the edges set and the center gently quivers, verify the egg mixture reaches 160°F, then give the pie time to cool and chill. Make it ahead for Thanksgiving, keep leftovers refrigerated, and serve with a simple spoonful of whipped cream.
SEO details
- Primary keyword: easy pumpkin pie with evaporated milk
- Secondary queries: easy pumpkin pie recipe with evaporated milk; classic Thanksgiving pumpkin pie; pumpkin pie with canned pumpkin and evaporated milk; how to tell when pumpkin pie is done; make-ahead pumpkin pie for Thanksgiving; homemade pumpkin pie with store-bought crust
- SEO title: Easy Pumpkin Pie with Evaporated Milk for Thanksgiving
- Meta description: Make easy pumpkin pie with evaporated milk: a warmly spiced, creamy Thanksgiving classic with clear make-ahead and doneness tips.
- Canonical slug suggestion: `easy-pumpkin-pie-with-evaporated-milk`
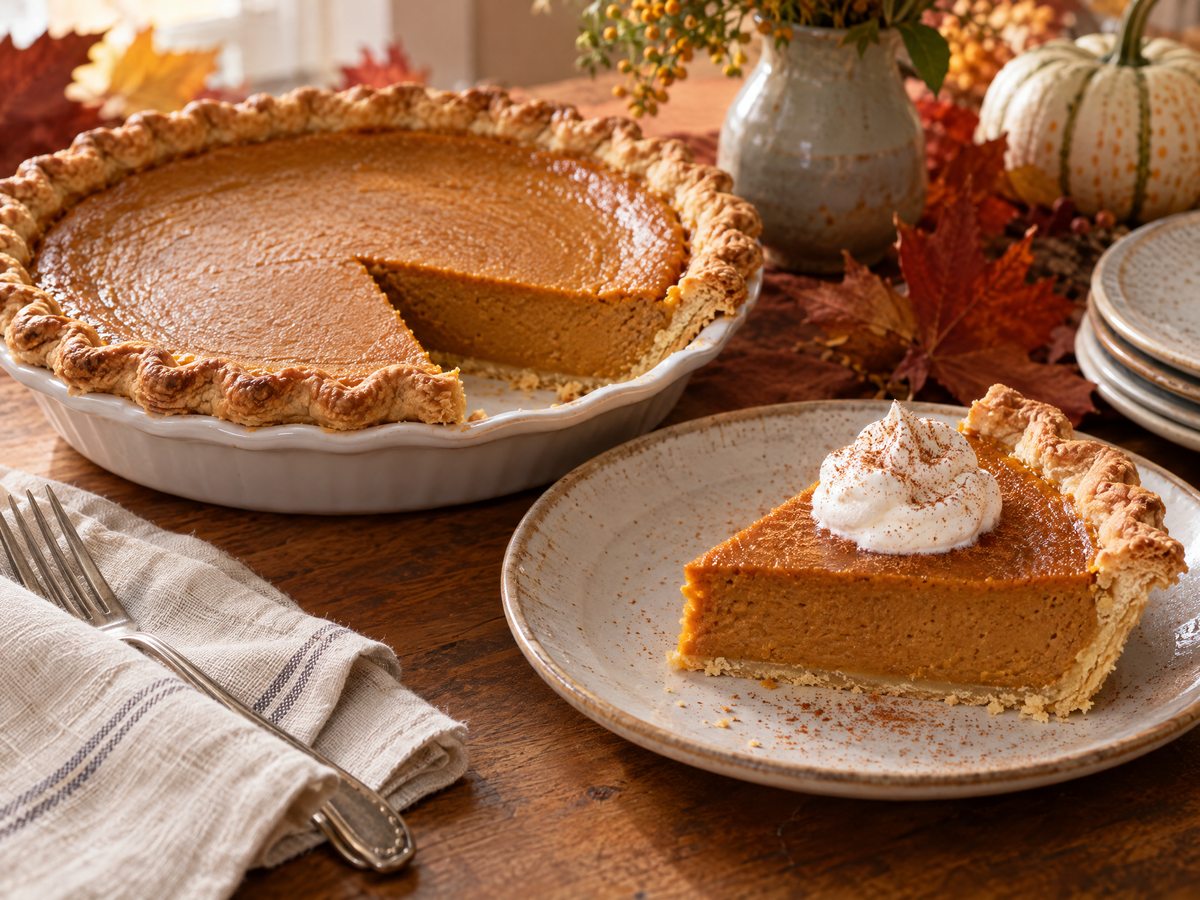
- Image alt text: A slice of pumpkin pie with a smooth orange custard filling, flaky crimped crust, and a small swirl of whipped cream on a white plate.
Trend and nutrition caveat: Search evidence above is seasonal and descriptive; no search volume, difficulty, or competition estimate is claimed. Calories are omitted because brands and crust choice vary; any published nutrition panel should be calculated from the exact products and serving size used.
—
Recipe card
Yield: One 9-inch pie, about 8 servings Prep time: 15 minutes Cook time: 50–60 minutes Cooling and chilling: At least 5 hours Total time: About 6 hours 15 minutes (including minimum cooling and chilling)
Ingredients
- 1 (9-inch) unbaked pie crust, refrigerated or thawed according to package directions
- 1 (15-ounce) can 100% pumpkin purée (not pumpkin pie filling)
- ¾ cup packed light brown sugar
- 1 teaspoon ground cinnamon
- ½ teaspoon ground ginger
- ¼ teaspoon ground nutmeg
- ⅛ teaspoon ground cloves
- ½ teaspoon fine salt
- 3 large eggs
- 1 (12-ounce) can evaporated milk
Instructions
- Heat oven to 425°F with a rack in the lower third. Fit the crust in a 9-inch pie plate, crimp the edge, and set the plate on a rimmed baking sheet.
- Whisk brown sugar, cinnamon, ginger, nutmeg, cloves, and salt in a large bowl.
- Whisk in pumpkin until smooth. Add eggs and whisk gently just until no streaks remain.
- Slowly whisk in evaporated milk. Pour the filling into the unbaked crust.
- Bake 15 minutes at 425°F. Reduce oven to 350°F and bake another 35–45 minutes. Shield the crust edge if browning too quickly.
- Check that the edges are set and the center quivers gently, not liquidly. For safety, check the center with an instant-read thermometer; egg mixtures should reach 160°F. Bake in short increments if needed.
- Cool on a rack about 2 hours. Refrigerate promptly and chill at least 3 more hours before slicing. Store leftovers covered in the refrigerator and use within 3–4 days.
Sources
- Google Trends Thanksgiving 2025
- Google Trends breaks down top searched Thanksgiving pies
- Shell Eggs from Farm to Table
- Pumpkin Pie