Imagine spreading a rich, creamy pat of butter on warm toast—only this butter was made by you, in just a few minutes, with just one ingredient. Say goodbye to store-bought butter filled with preservatives and hello to pure, creamy, golden goodness. These homemade butter recipes are not only simple but also deeply satisfying. Whether you’re a seasoned cook or a beginner, making butter at home is a rewarding experience that elevates your meals with fresh, natural flavor.
Butter isn’t just for spreading—it’s a culinary cornerstone. From flaky pastries to golden sautés, quality butter makes all the difference. The best part? You don’t need fancy equipment or hours of effort. With just heavy cream and a little patience, you can create restaurant-quality butter right in your kitchen. Plus, these homemade butter recipes are customizable, allowing you to infuse herbs, spices, or even honey for a personalized touch.
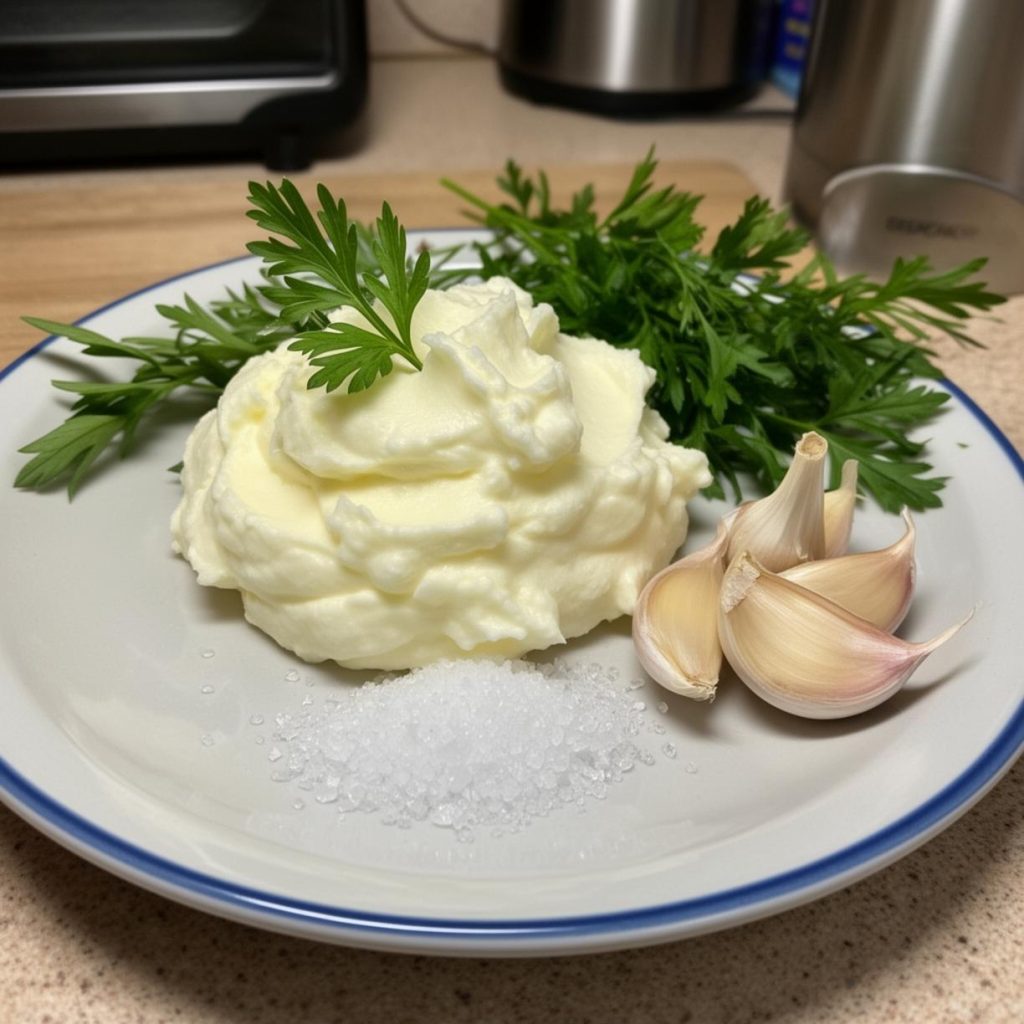
Ingredients
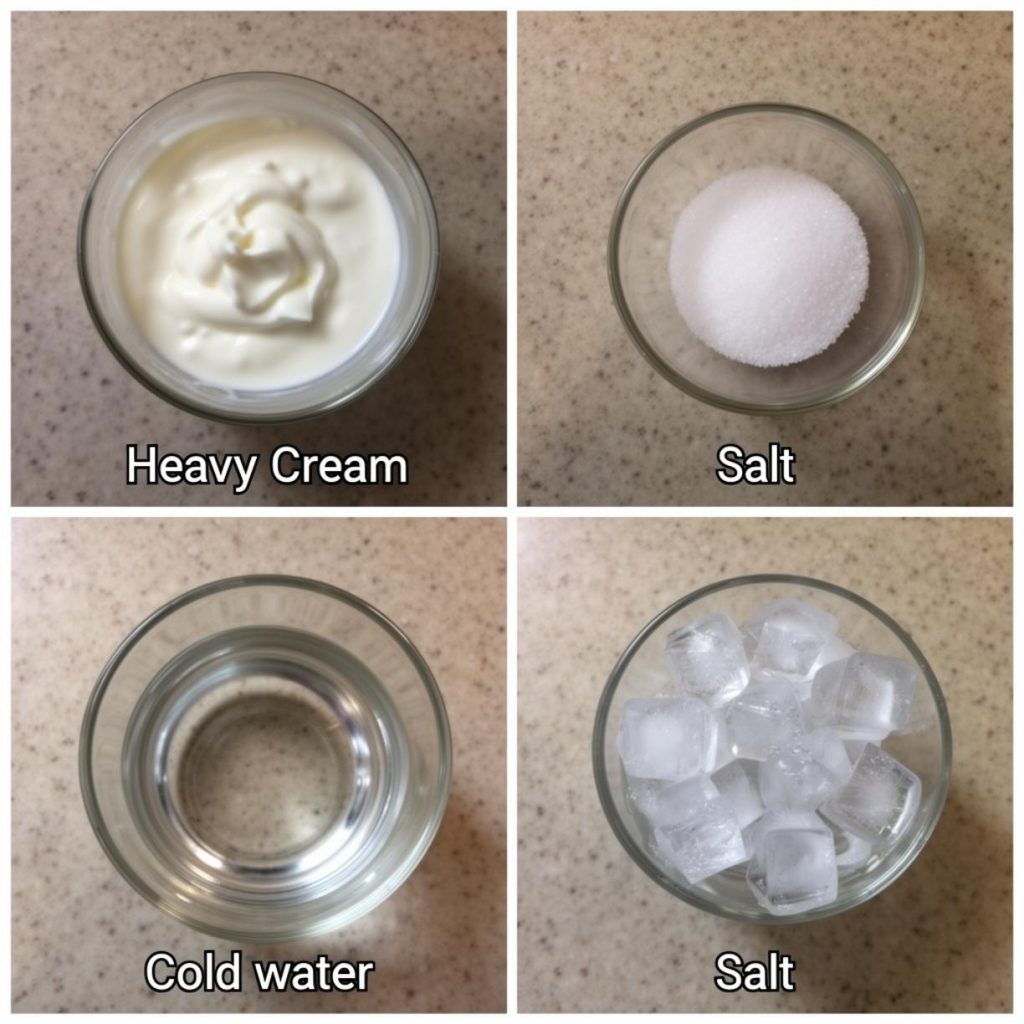
- 2 cups heavy cream (preferably organic and pasteurized, not ultra-pasteurized)
- 1/4 teaspoon fine sea salt (optional, for salted butter)
- 1 tablespoon fresh herbs (such as rosemary, thyme, or chives), finely chopped (optional)
- 1 teaspoon honey or maple syrup (optional, for sweet butter)
- 1 clove garlic, minced (optional, for garlic butter)
Substitutions: Use non-dairy cream alternatives like coconut cream for a vegan version (though results may vary in texture and yield).
Prep Time & Cook Time
- Prep Time: 5 minutes
- Active Time: 10–15 minutes (churning)
- Total Time: 15–20 minutes
- Rest Time: 30 minutes (optional, for flavor development)
These homemade butter recipes are perfect for busy days. There’s no cooking involved—just churning and resting. You can even make a batch on Sunday and enjoy fresh butter all week long.
Step-by-Step Instructions
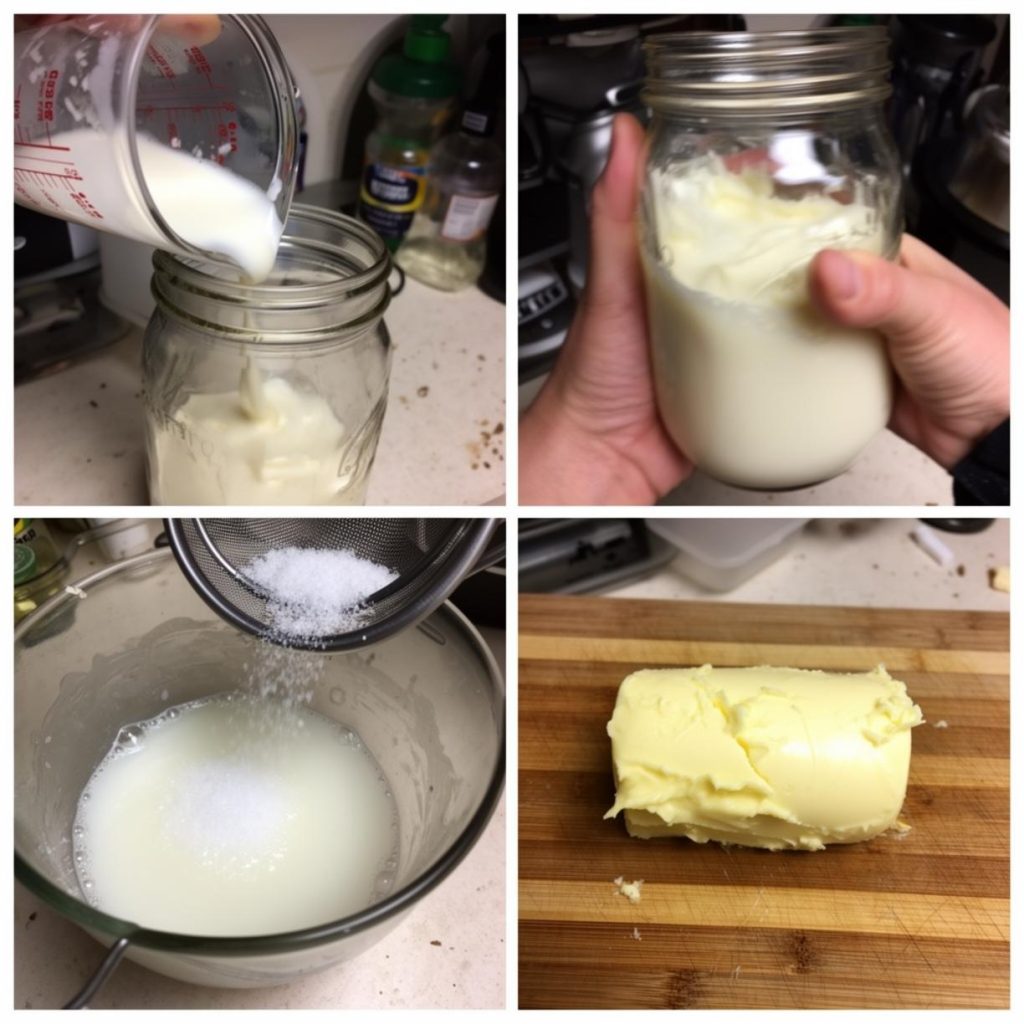
- Chill Your Equipment: Place your mixing bowl and whisk attachment (or jar if using a mason jar method) in the freezer for 10 minutes. Cold equipment helps the cream separate faster.
- Start Churning: Pour the heavy cream into the chilled bowl. Using a stand mixer or hand mixer, begin mixing on medium speed. You’ll first see soft peaks, then stiff peaks.
- Wait for the Magic: Continue mixing. After 5–10 minutes, the cream will suddenly separate into solid butter and liquid buttermilk. This is the moment you’ve been waiting for!
- Drain the Buttermilk: Line a fine-mesh strainer with cheesecloth and pour the mixture through it. Reserve the buttermilk for baking—it’s gold in pancakes or biscuits.
- Wash the Butter: Rinse the butter under cold water while pressing it with a spatula or your hands. This removes remaining buttermilk and prevents spoilage. Keep rinsing until the water runs clear.
- Season and Shape: Transfer the butter to a bowl. Add salt, herbs, or other flavorings if desired. Mix well, then shape into a log using parchment paper or press into a butter dish.
- Chill and Store: Refrigerate for at least 30 minutes to firm up. Your homemade butter without churn is now ready to use!
Pro Tip: If you don’t have a mixer, use a mason jar. Shake the cream vigorously for 10–15 minutes until it separates. It’s a workout, but it works!
Nutritional Information / Health Benefits
Homemade butter is rich in healthy fats, including conjugated linoleic acid (CLA) and fat-soluble vitamins like A, D, E, and K2. These nutrients support immune function, bone health, and skin vitality. Grass-fed butter contains even more omega-3s and beta-carotene.
- Serving Size: 1 tablespoon
- Calories: ~100
- Fat: 11g (mostly saturated, but natural)
- Cholesterol: 30mg
- Sodium: 0mg (unless salt is added)
Unlike commercial butter, your homemade butter recipes contain no additives, stabilizers, or artificial flavors. You control the ingredients, making it a cleaner, healthier choice.
Recipe Variations & Serving Suggestions
- Herb Butter: Mix in parsley, dill, and lemon zest. Perfect for grilled fish or steak.
- Sweet Honey Butter: Fold in honey and a pinch of cinnamon. Ideal for pancakes or toast.
- Garlic Butter: Add roasted garlic and parsley. Great for bread or pasta.
- Vegan Option: Use coconut cream and nutritional yeast for a dairy-free twist.
Serve your butter on warm sourdough, cornbread, or baked potatoes. It also elevates popcorn, vegetables, and sauces.
Common Cooking Mistakes to Avoid
- Using Ultra-Pasteurized Cream: This type of cream often fails to churn properly. Always choose pasteurized, not ultra-pasteurized, cream.
- Skipping the Washing Step: Failing to rinse the butter leads to spoilage. Always wash with cold water to remove buttermilk.
- Over-Softening the Cream: Start with cold cream. Warm cream won’t whip properly.
- Not Chilling Equipment: Cold bowls and beaters speed up the process. Don’t skip this step.
- Using Low-Fat Cream: You need heavy cream with at least 36% fat. Lower fat content won’t separate.
Storage & Reheating Tips
Store your homemade butter without churn in an airtight container in the refrigerator for up to 2 weeks. For longer storage, freeze for up to 3 months. Wrap in parchment paper first to prevent freezer burn.
To soften, leave at room temperature for 15–20 minutes. For cooking, melt gently over low heat to preserve flavor.
Conclusion
Making butter at home is easier than you think—and incredibly rewarding. These homemade butter recipes prove that quality food doesn’t require complexity. With just cream and a little effort, you can create a product that outshines anything from the store.
Whether you’re churning with a mixer or shaking in a jar, the process connects you to centuries of culinary tradition. Plus, your homemade butter without churn is free from preservatives and full of flavor.
Try one of these recipes today and taste the difference. Share your butter-making journey in the comments below—we’d love to hear your results!
FAQs
1. Can I use pasteurized milk instead of cream?
No. Butter requires high-fat cream (36%+ fat). Milk won’t separate into butter.
2. Why didn’t my cream turn into butter?
You may have used ultra-pasteurized cream or stopped churning too early. Keep mixing until it separates.
3. Can I make butter with a food processor?
Yes! A food processor works well. Pulse until the butter forms.
4. What can I do with the leftover buttermilk?
Use it in pancakes, biscuits, or smoothies. It adds tenderness and tang.
5. How do I know when the butter is fully washed?
The water should run clear, and the butter should feel firm and grain-free.
—
Homemade Butter
Learn how to make rich, creamy homemade butter in minutes with just one ingredient. This simple and satisfying recipe allows you to create pure, natural butter, free from preservatives, elevating your meals with fresh flavor. Whether you're a seasoned cook or a beginner, making butter at home is a rewarding experience that doesn't require fancy equipment or hours of effort.
Ingredients
Instructions
- Chill Your Equipment: Place your mixing bowl and whisk attachment (or jar if using a mason jar method) in the freezer for 10 minutes. Cold equipment helps the cream separate faster.
- Start Churning: Pour the heavy cream into the chilled bowl. Using a stand mixer or hand mixer, begin mixing on medium speed. You’ll first see soft peaks, then stiff peaks.
- Wait for the Magic: Continue mixing. After 5–10 minutes, the cream will suddenly separate into solid butter and liquid buttermilk. This is the moment you’ve been waiting for!
- Drain the Buttermilk: Line a fine-mesh strainer with cheesecloth and pour the mixture through it. Reserve the buttermilk for baking—it’s gold in pancakes or biscuits.
- Wash the Butter: Rinse the butter under cold water while pressing it with a spatula or your hands. This removes remaining buttermilk and prevents spoilage. Keep rinsing until the water runs clear.
- Season and Shape: Transfer the butter to a bowl. Add salt, herbs, or other flavorings if desired. Mix well, then shape into a log using parchment paper or press into a butter dish.
- Chill and Store: Refrigerate for at least 30 minutes to firm up. Your homemade butter without churn is now ready to use!